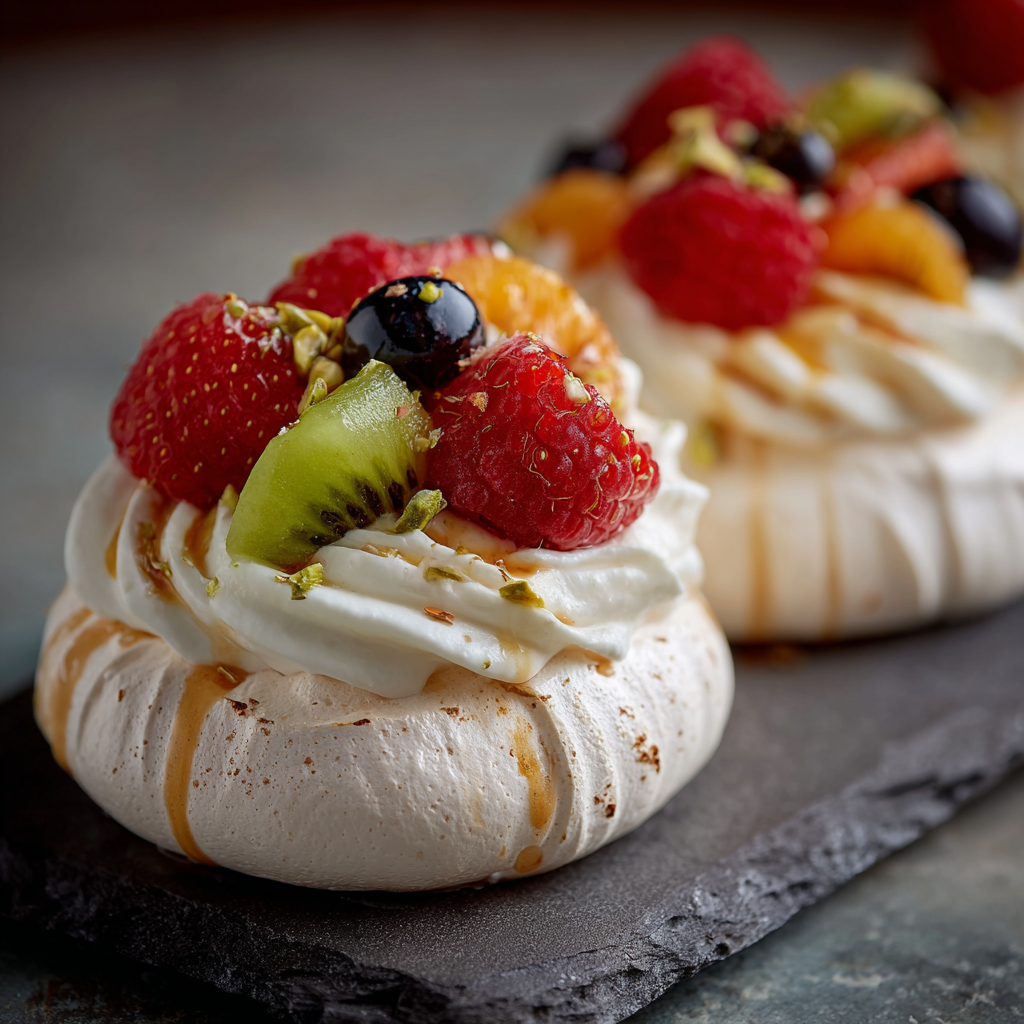
At Sugar Detox Lab, we believe that the most memorable desserts are the ones that combine elegance with simplicity—treats that look like they came from a fancy patisserie but are surprisingly achievable in your own kitchen. These Mini Pavlovas are exactly that kind of dessert. Imagine a crisp, airy meringue shell with a soft, marshmallow-like center, piled high with billowy whipped cream and topped with a colorful array of fresh berries and fruit. They’re stunning, individually portioned, and utterly delicious. Named after the legendary Russian ballerina Anna Pavlova, this dessert is as graceful and beautiful as its namesake. And the best part? They’re naturally gluten-free and can be made with less sugar for a healthier twist.
What Are Mini Pavlovas and Why This Mindful Approach Matters
Pavlova is a beloved dessert with roots in both Australia and New Zealand, where it’s a staple of holiday tables and special occasions. A classic pavlova features a large meringue base with a crisp crust and soft, marshmallowy interior, topped with whipped cream and fresh fruit.
Our Mini Pavlovas take this beloved dessert and scale it down into perfect individual portions. Each little meringue nest is baked to perfection—crisp on the outside, tender and slightly chewy on the inside. Topped with lightly sweetened whipped cream and a generous helping of fresh berries, kiwi, or other fruits, they’re a dessert that feels both special and approachable.
This mindful approach matters because it demonstrates how a classic dessert can be adapted for portion control and healthier ingredients. These Mini Pavlovas are naturally portion-controlled—each one is a perfect single serving. The meringue itself is fat-free, and the topping is mostly fresh fruit, which adds fiber, vitamins, and antioxidants. By making them at home, you control the amount of sugar in the meringue and can choose to sweeten the whipped cream lightly or not at all, letting the natural sweetness of the fruit shine.
A Realistic Look at Ingredients and Their Health Benefits
Let’s explore the nutritional story behind each component of these elegant, airy desserts Mini Pavlovas:
- Egg Whites: The foundation of the meringue. Egg whites are pure protein—fat-free and cholesterol-free—making them an excellent choice for a lighter dessert. They provide all the structure for the pavlova, creating that signature crisp exterior and soft interior when whipped with sugar. You can learn more about the science and culinary uses of egg whites on Wikipedia.
- Granulated Sugar: Essential for stabilizing the meringue and creating that crisp texture. Sugar is necessary for pavlova—without it, the egg whites won’t form the proper structure. However, we use a measured amount and offer suggestions for reducing it or using alternatives in the Notes section. For context, understanding how different sweeteners affect the body can be helpful; the concept of the glycemic index explains how foods affect blood sugar levels.
- Cornstarch: The secret ingredient that helps create that soft, marshmallowy interior. A small amount stabilizes the meringue and absorbs any excess moisture, ensuring the perfect texture.
- Vanilla Extract: Adds warmth and depth of flavor, complementing both the meringue and the fruit.
- Whipped Cream: The luxurious, creamy topping. Heavy cream adds richness and satisfaction. For a lighter option, see the Notes section. You can also use coconut cream for a dairy-free version.
- Fresh Fruits (Berries, Kiwi, etc.): The vibrant, healthy topping. Fresh berries are packed with antioxidants, vitamin C, and fiber. Strawberries, raspberries, blueberries, and blackberries are classic choices. Kiwi adds a tropical note and beautiful green color. The fruit provides natural sweetness and balances the richness of the cream and meringue.
This Mini Pavlovas recipe is naturally gluten-free and can be adapted to be lower in sugar, dairy-free, or vegan (see Notes). It’s a perfect example of a dessert that can be both elegant and mindful.
Navigating the Challenges: Tips for Pavlova Success
Pavlova can seem intimidating, but with these tips, you’ll achieve perfect results:
- Use Room Temperature Egg Whites: Cold egg whites don’t whip as well. Separate your eggs when cold (easier to separate without breaking yolks), then let the whites sit at room temperature for 30 minutes before whipping.
- Ensure Your Bowl is Spotlessly Clean: Any trace of fat or grease will prevent egg whites from whipping properly. Wash your bowl and whisk attachment with hot, soapy water, then wipe with vinegar or lemon juice to ensure they’re completely grease-free.
- No Yolk, Not Even a Speck: Fat from egg yolk will sabotage your meringue. Separate each egg over a small bowl first, then transfer the pristine white to your main bowl. If a yolk breaks, save that egg for another use.
- Add Sugar Slowly: Add the sugar one tablespoon at a time, allowing it to dissolve fully between additions. The meringue should feel completely smooth when rubbed between your fingers—no graininess.
- Test for Stiff Peaks: The meringue is ready when it holds stiff, glossy peaks and doesn’t slide around when you tilt the bowl.
- Pipe or Spoon Gently: For mini pavlovas, you can pipe the meringue using a star tip for a decorative edge, or simply spoon it into nests. Create a slight indentation in the center to hold the cream and fruit.
- Bake Low and Slow: Pavlova is baked at a low temperature to dry it out without browning. A completely cooled oven with the door slightly ajar is traditional for large pavlovas; for mini ones, a low oven works well.
- Don’t Open the Oven Door: Avoid opening the oven during baking, as temperature fluctuations can cause the meringues to crack.
- Cool Completely in the Oven: Turn off the oven and leave the door slightly ajar, allowing the meringues to cool completely. This gradual cooling helps prevent cracking.

Tips and Trends for Mindful Dessert Making
The trend toward “individual desserts” continues to grow, and these Mini Pavlovas are a perfect example. Individual portions are naturally portion-controlled, elegant, and eliminate the need for slicing and serving at the table.
Another significant trend is the appreciation for “gluten-free” desserts that don’t compromise on taste or texture. Pavlova is naturally gluten-free, making it a wonderful option for guests with dietary restrictions.
AI-powered meal planning tools can help you incorporate recipes like this into your special occasion menus. Apps like Yummly or Paprika allow you to save this recipe, generate shopping lists, and even set timers for each step of the baking process.
The growing interest in “fruit-forward” desserts aligns perfectly with pavlova. With its generous topping of fresh fruit, it’s a dessert that feels lighter and more virtuous than many alternatives, while still being absolutely delicious.
Frequently Asked Questions (FAQ)
Question: My meringue deflated or is weeping. What went wrong?
Answer: Weeping (beads of moisture) or deflation usually indicates under-whipped meringue or sugar that wasn’t fully dissolved. The mixture should be thick, glossy, and completely smooth when rubbed between your fingers. Also, avoid making pavlova on humid days—humidity is the enemy of meringue.
Question: Can I make pavlovas without cream of tartar?
Answer: This recipe doesn’t call for cream of tartar—the cornstarch helps stabilize the meringue. If you want extra insurance, you can add ¼ teaspoon of cream of tartar with the egg whites at the beginning.
Question: My pavlovas cracked. Is that okay?
Answer: Some cracking is normal and part of the rustic charm of pavlova. To minimize cracking, ensure you cool them gradually in the oven with the door slightly ajar. The toppings will cover minor imperfections beautifully.
Question: Can I use frozen fruit instead of fresh?
Answer: Fresh fruit is recommended for the best texture and appearance. Frozen fruit will release too much liquid as it thaws, potentially making the meringue soggy. If you must use frozen, thaw and drain it very well before using.
Question: Can I make one large pavlova instead of mini ones?
Answer: Absolutely! Spread the meringue into an 8-inch circle on parchment paper, creating a slight indentation in the center. Bake at 250°F for 75-90 minutes, then cool in the oven as directed. Top with whipped cream and fruit just before serving.
Question: How do I store leftover meringue nests?
Answer: Store unfilled meringue nests in an airtight container at room temperature for up to 3 days. Do not refrigerate—the moisture will ruin them. Once filled, pavlovas should be eaten immediately.
Conclusion
These Mini Pavlovas are proof that elegant, impressive desserts can be achievable in any home kitchen. With their crisp shells, soft centers, billowy cream, and vibrant fresh fruit, they’re a dessert that’s sure to wow your guests. Perfect for dinner parties, holidays, or any time you want to serve something special.
We encourage you to make these for your next celebration, experiment with different fruit combinations, and enjoy the compliments that will surely come your way.
For more recipes that help you create beautiful, mindful desserts with intention, explore our full collection at SugarDetoxLab.com. Did you try these mini pavlovas? We’d love to hear about your experience in the comments below!