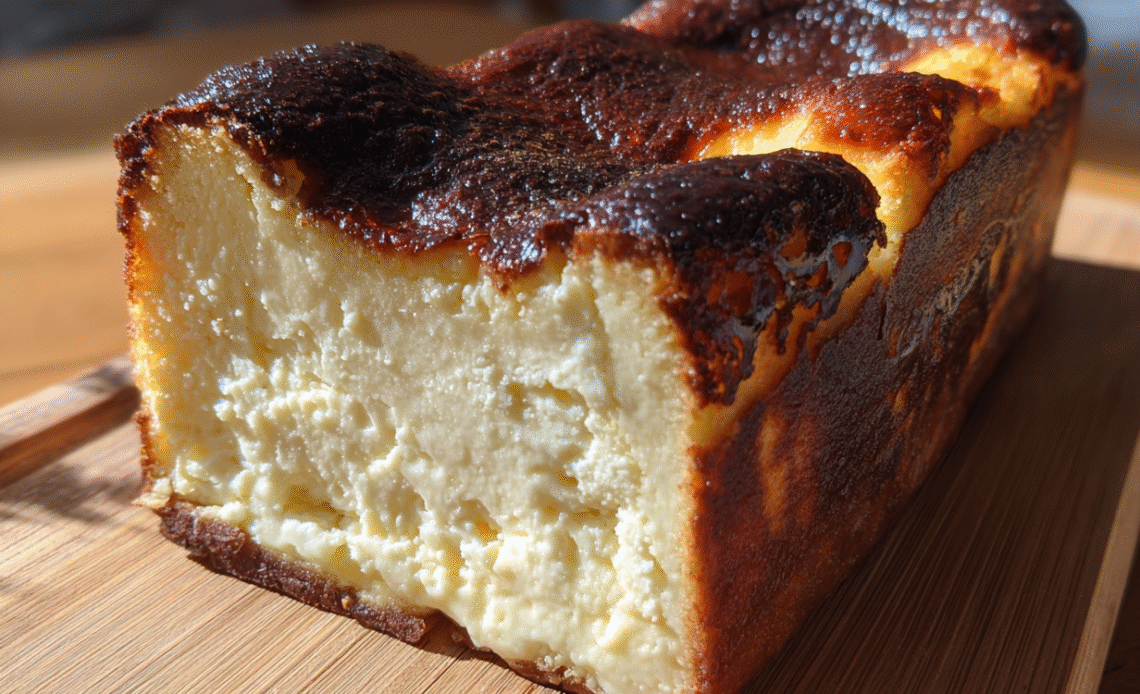
If you’re searching for a rich, creamy dessert that looks rustic yet tastes absolutely luxurious, Burnt Basque Cheesecake in a Loaf Pan is the perfect recipe to try. This famous cheesecake, known for its caramelized top and silky interior, has taken the baking world by storm—and making it in a loaf pan makes the recipe even easier and more accessible.
Originally baked at high temperatures to create its signature dark top, Burnt Basque Cheesecake in a Loaf Pan delivers a beautifully creamy center with a lightly caramelized flavor that sets it apart from traditional cheesecakes. The loaf pan version is perfect for small households, beginner bakers, or anyone who wants a manageable batch of this iconic dessert.
With just a handful of simple ingredients—cream cheese, eggs, sugar, cream, and vanilla—you can create a bakery-style dessert right at home.
In this complete guide, you’ll learn everything about making the perfect loaf pan Basque cheesecake, including baking tips, variations, and storage advice.
What Is Burnt Basque Cheesecake?
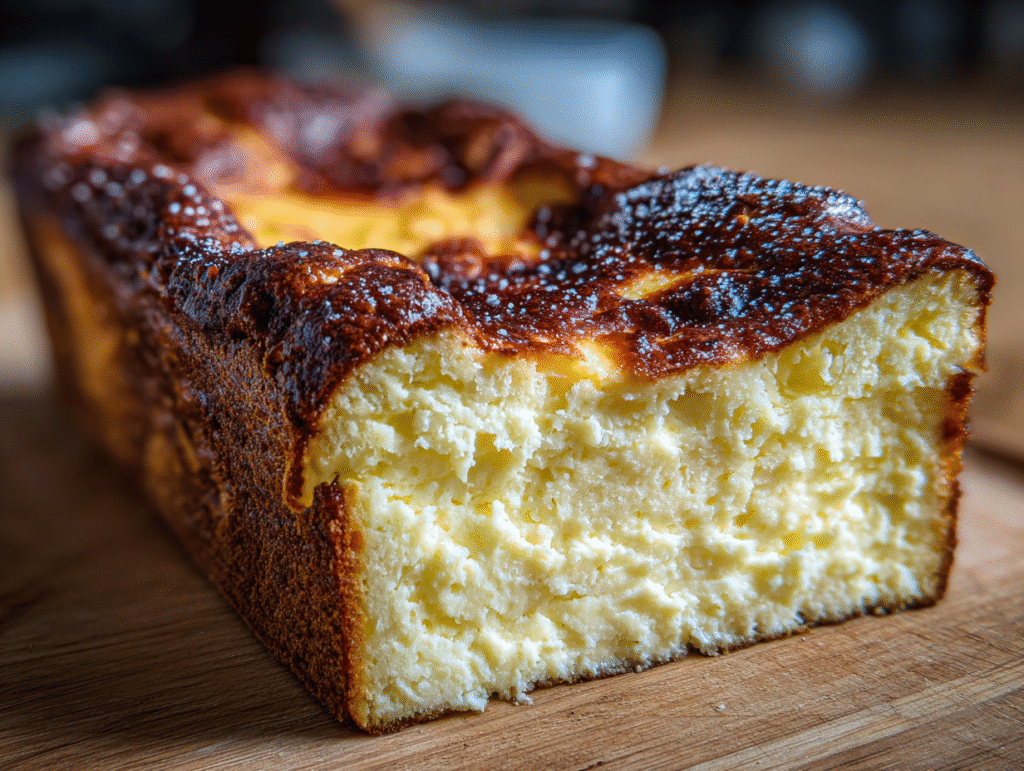
Burnt Basque cheesecake is a Spanish-style cheesecake famous for its intentionally deep golden or “burnt” top and incredibly creamy custard-like interior.
Unlike traditional cheesecakes, it:
- Has no crust
- Is baked at high temperatures
- Develops a caramelized exterior
- Has a soft, almost mousse-like center
This cheesecake originated in the Basque region of Spain and quickly became a worldwide dessert trend due to its unique texture and rich flavor.
Why Bake Basque Cheesecake in a Loaf Pan?
Traditional Basque cheesecake is baked in a round springform pan, but using a loaf pan offers several advantages.
Benefits of a Loaf Pan Version
- Perfect small-batch cheesecake
- Requires fewer ingredients
- Easier for beginner bakers
- Faster baking time
- Great for serving smaller households
This method produces the same creamy texture while keeping the process simple and approachable.
Ingredients for Burnt Basque Cheesecake in a Loaf Pan
This recipe uses a handful of simple ingredients that come together to create a rich and smooth dessert.
Cheesecake Batter
- 1 1/2 cups cream cheese, softened (full-fat)
- 1/2 cup granulated sugar
- 2 large eggs, room temperature
- 3/4 cup heavy cream
- 1/2 teaspoon vanilla extract
- 1/8 teaspoon salt
- 1 tablespoon all-purpose flour
Each ingredient plays an important role in the texture and flavor of the cheesecake.
Ingredient Breakdown
Understanding your ingredients can help you achieve the perfect cheesecake.
Cream Cheese
Cream cheese is the star of the recipe. Full-fat cream cheese creates the classic rich and creamy texture.
Sugar
Granulated sugar sweetens the cheesecake and helps create the caramelized top during baking.
Eggs
Eggs provide structure and help the cheesecake set while maintaining a smooth custard texture.
Heavy Cream
Heavy cream adds extra richness and contributes to the silky interior.
Flour
A small amount of flour helps stabilize the cheesecake batter.
Equipment You’ll Need
Before you start baking, gather these tools:
- 9×5 inch loaf pan
- Parchment paper
- Mixing bowl
- Hand mixer or whisk
- Rubber spatula
Lining the pan with parchment paper is essential to achieve the rustic look typical of Basque cheesecake.
How to Make Burnt Basque Cheesecake in a Loaf Pan
Follow these simple steps to create this delicious dessert.
Step 1: Prepare the Pan
Preheat your oven to 400°F (200°C).
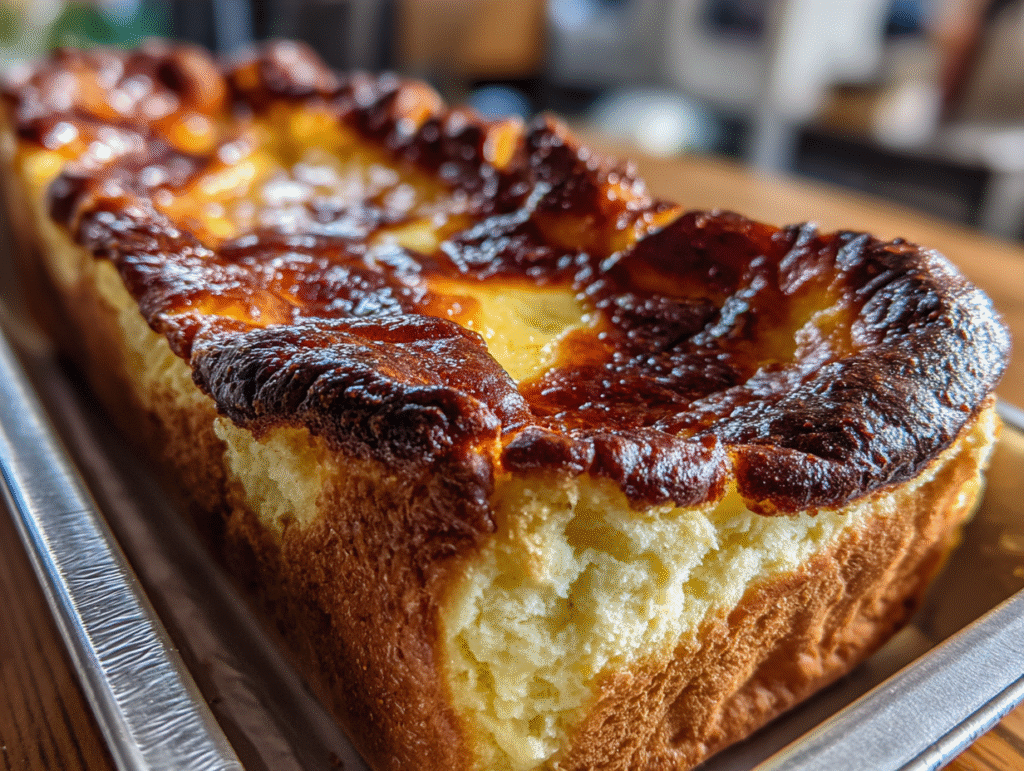
Line a loaf pan with parchment paper, allowing the paper to extend above the edges.
This creates the classic wrinkled cheesecake appearance.
Step 2: Beat the Cream Cheese and Sugar
In a mixing bowl, combine:
- Cream cheese
- Granulated sugar
Beat until smooth and creamy with no lumps.
This step ensures a silky cheesecake texture.
Step 3: Add the Eggs
Add the eggs one at a time, mixing well after each addition.
Make sure the eggs are room temperature to help them blend smoothly.
Step 4: Add Cream and Flavorings
Mix in:
- Heavy cream
- Vanilla extract
- Salt
Stir until the batter becomes smooth and slightly thick.
Step 5: Add the Flour
Sift in the flour and gently mix until fully incorporated.
Avoid overmixing to maintain a delicate texture.
Step 6: Pour the Batter
Pour the batter into the prepared loaf pan.
Tap the pan lightly on the counter to remove air bubbles.
Step 7: Bake the Cheesecake
Bake for 35–45 minutes.
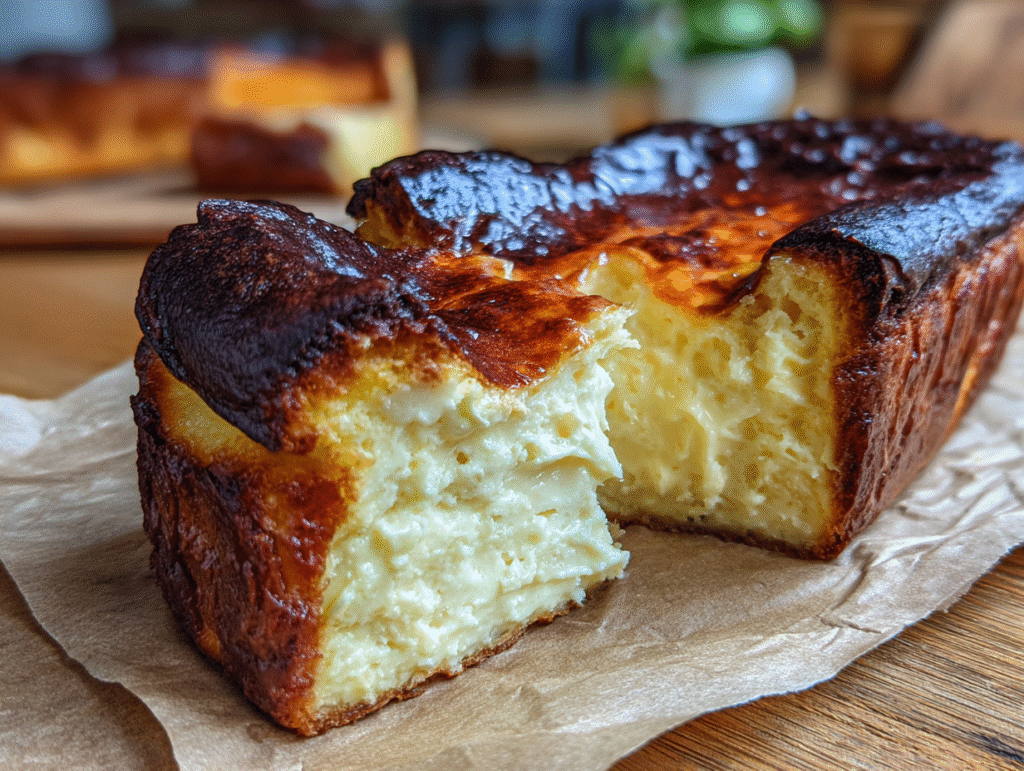
The top should turn deep golden brown and the center should still slightly jiggle.
This is what creates the famous custard-like center.
Step 8: Cool and Set
Allow the cheesecake to cool at room temperature for about 1 hour.
Then refrigerate for at least 4 hours or overnight.
Chilling helps the texture fully set.
Step 9: Slice and Serve
Once chilled, lift the cheesecake out of the pan using the parchment paper.
Slice and serve.
The inside should be ultra creamy and smooth.
Tips for Perfect Basque Cheesecake
Follow these tips for the best results.
Use Room Temperature Ingredients
Room temperature ingredients blend more smoothly and prevent lumps.
Don’t Overbake
The center should still jiggle slightly when you remove it from the oven.
Embrace the “Burnt” Top
The dark top is intentional and provides a rich caramelized flavor.
Chill Before Serving
Chilling improves both flavor and texture.
Flavor Variations to Try
Once you master the classic recipe, try experimenting with different flavors.
Lemon Basque Cheesecake
Add 1 tablespoon lemon zest for a bright citrus flavor.
Chocolate Basque Cheesecake
Mix in 2 tablespoons cocoa powder to create a chocolate version.
Coffee Cheesecake
Add 1 teaspoon espresso powder for a subtle coffee flavor.
Berry Swirl Cheesecake
Swirl in raspberry or strawberry puree before baking.
How to Store Burnt Basque Cheesecake
Proper storage helps maintain freshness.
Refrigerator Storage
Store the cheesecake in an airtight container for up to 4 days.
Freezer Storage
You can freeze slices for up to 2 months.
Wrap them tightly in plastic wrap and store in a freezer-safe container.
Serving Suggestions
Burnt Basque cheesecake is delicious on its own but can also be served with:
- Fresh berries
- Powdered sugar
- Caramel sauce
- Chocolate drizzle
- Whipped cream
It pairs beautifully with:
- Coffee
- Espresso
- Tea
- Dessert wine
Common Mistakes to Avoid
Avoid these mistakes when making Basque cheesecake.
Using Cold Cream Cheese
Cold cream cheese creates lumps in the batter.
Skipping the Parchment Paper
Parchment paper helps create the rustic shape and prevents sticking.
Baking at Low Temperature
High heat is necessary for the signature caramelized top.
Frequently Asked Questions
What makes Burnt Basque Cheesecake different from regular cheesecake?
Burnt Basque cheesecake is baked at high heat without a crust, creating a caramelized top and a creamy custard-like center.
Can you make Basque cheesecake in a loaf pan?
Yes. A loaf pan works perfectly for smaller batches while maintaining the same rich texture and flavor.
Why is the top of Basque cheesecake burnt?
The dark top is intentional and adds a deep caramelized flavor that balances the creamy interior.
How do you know when Basque cheesecake is done baking?
The edges should be set while the center still slightly jiggles.
Can Basque cheesecake be made ahead of time?
Yes. It actually tastes better after chilling overnight.
Do you need a water bath for Basque cheesecake?
No. Unlike traditional cheesecake, Basque cheesecake is baked without a water bath.
Final Thoughts
Burnt Basque Cheesecake in a Loaf Pan is the perfect dessert for anyone who loves creamy, rich cheesecakes with a unique caramelized flavor. With its rustic appearance, silky interior, and simple ingredients, this recipe proves that elegant desserts don’t have to be complicated.
The loaf pan version makes this famous cheesecake more approachable for home bakers while still delivering the same indulgent texture and flavor.
Try This Burnt Basque Cheesecake Today
Now that you know how easy it is to make Burnt Basque Cheesecake in a Loaf Pan, it’s time to bring this incredible dessert to your kitchen. With just a few ingredients and simple steps, you can create a bakery-quality cheesecake that’s sure to impress family and friends.
If you enjoyed this recipe, be sure to save it, share it, and explore more delicious homemade dessert recipes to expand your baking skills.