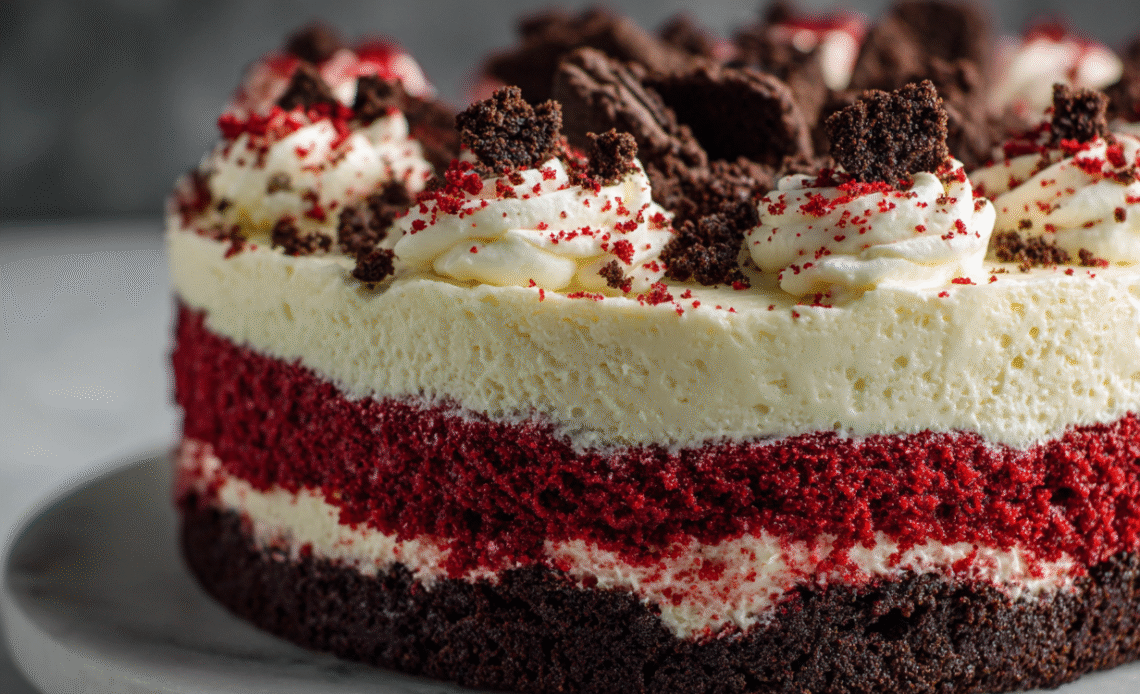
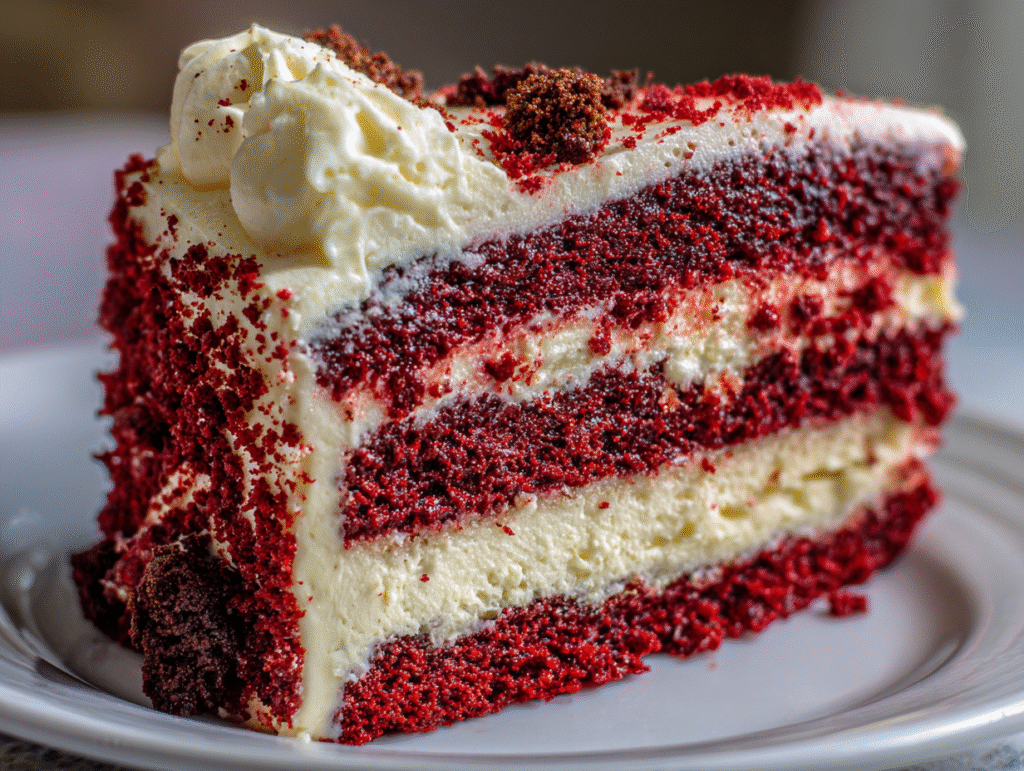
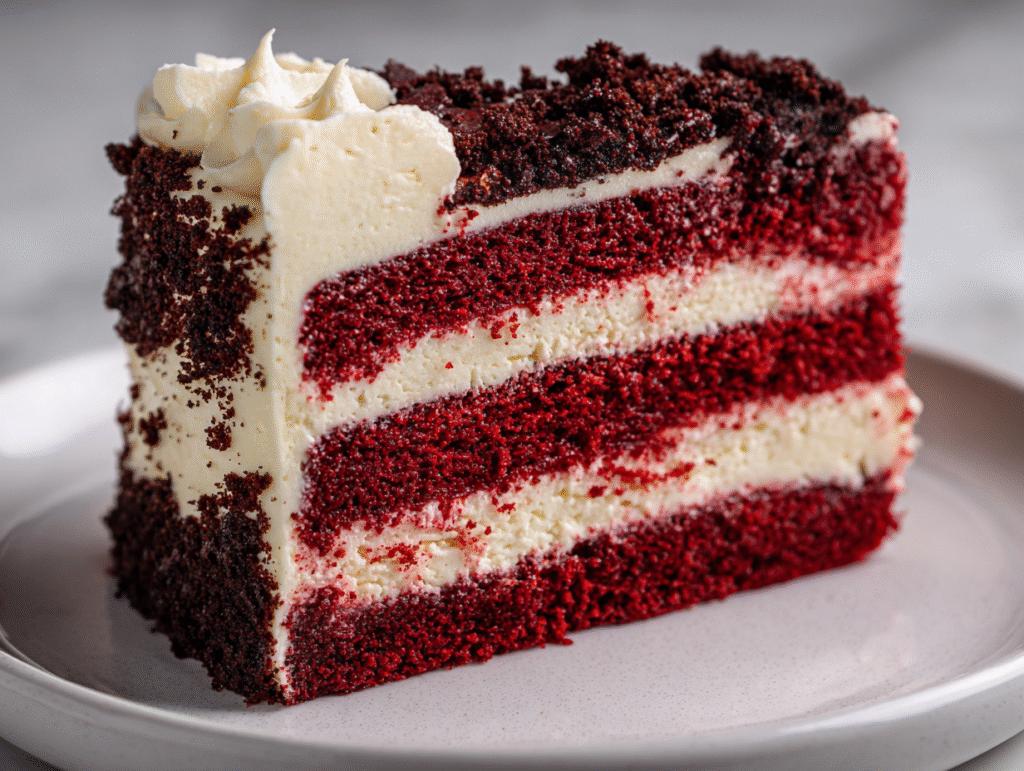
Indulge in the ultimate desserts experience with this Red Velvet Cheesecake Layer Cake. This show-stopping dessert combines the best of two beloved classics: moist red velvet cake and rich, creamy cheesecake. Each bite delivers a perfect harmony of flavors and textures, making it ideal for special occasions or when you simply want to treat yourself to something extraordinary.
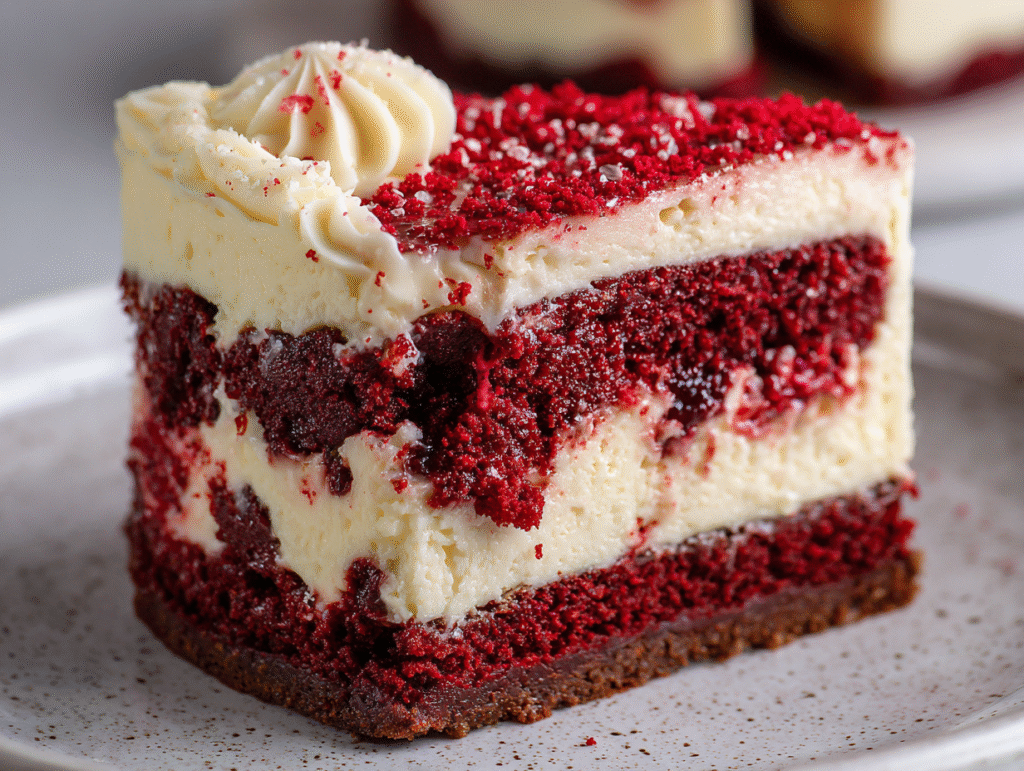
Crafted with layers of tender red velvet cake embracing a velvety cheesecake center, this cake is finished with a smooth cream cheese frosting and a glossy red berry glaze. The optional chocolate cookie crust adds a delightful crunch that contrasts beautifully with the soft cake layers. Whether you’re celebrating a birthday, holiday, or just baking for the love of it, this recipe promises to impress.
Recipe Information
- Prep Time: 45 minutes
- Cook Time: 60 minutes
- Total Time: 1 hour 45 minutes
- Servings: 10 slices
Ingredients
Chocolate Cookie Crust (Optional)
- 2 cups (200 g) chocolate cookie crumbs (Oreo or similar, without filling)
- ½ cup (115 g) unsalted butter, melted
Red Velvet Cake Layers
- 2 ½ cups (315 g) all-purpose flour
- 1 ½ cups (300 g) granulated sugar
- 2 tbsp unsweetened cocoa powder
- 1 tsp baking soda
- 1 tsp baking powder
- 1 tsp fine sea salt
- 1 ½ cups (360 ml) buttermilk (or substitute: 1 ½ cups milk + 1 tbsp white vinegar, let sit 5 minutes)
- 1 cup (240 ml) neutral vegetable oil
- 2 large eggs, room temperature
- 2 tsp pure vanilla extract
- 1 tsp white vinegar
- 1–2 tbsp red gel food coloring
Cheesecake Layer
- 16 oz (450 g) full-fat cream cheese, softened
- ½ cup (100 g) granulated sugar
- 2 large eggs, room temperature
- 1 tsp pure vanilla extract
- ½ cup (120 ml) sour cream, full-fat, room temperature
Cream Cheese Frosting
- 16 oz (450 g) full-fat cream cheese, softened
- 1 cup (230 g) unsalted butter, softened
- 4 cups (480 g) powdered sugar, sifted
- 2 tsp pure vanilla extract
- Pinch of fine sea salt
Red Berry Glaze
- ½ cup (120 ml) high-quality strawberry or raspberry jam
- 2 tbsp water
- 1 tsp fresh lemon juice
Decoration
- Red velvet cake crumbs (from trimming edges)
- Dark chocolate chips or chunks
- Extra frosting for piping details
Equipment Needed
- Two 8-inch or 9-inch round cake pans (preferably with removable bottoms)
- One 8-inch or 9-inch springform pan
- Parchment paper
- Mixing bowls (various sizes)
- Electric stand mixer or hand mixer
- Whisk
- Rubber spatula
- Measuring cups and spoons
- Cooling rack
- Offset spatula
- Pastry bag with star tip (optional)
- Small saucepan
- Wire whisk
Step-by-Step Instructions
- Prepare Pans: Preheat oven to 350°F (175°C). Grease and line two 8-inch cake pans with parchment paper. If using a springform pan for the cheesecake, grease it and line the bottom with parchment.
- Make Chocolate Crust (Optional): Combine cookie crumbs and melted butter. Press firmly into the bottom of a prepared pan. Bake for 10 minutes at 350°F. Cool completely.
- Bake Red Velvet Layers: In a large bowl, whisk together flour, sugar, cocoa powder, baking soda, baking powder, and salt. In another bowl, whisk buttermilk, oil, eggs, vanilla, vinegar, and food coloring until smooth. Gradually mix the wet ingredients into the dry until just combined. Divide batter evenly between the prepared pans. Bake for 25–30 minutes, or until a toothpick inserted in the center comes out clean. Cool in pans for 10 minutes, then transfer to wire racks to cool completely.
- Prepare Cheesecake Layer: In a mixing bowl, beat cream cheese and sugar until smooth and creamy. Add eggs one at a time, mixing just until incorporated. Stir in vanilla and sour cream. Pour the mixture into the prepared springform pan. Place the pan in a larger baking dish and add 1 inch of hot water around it (water bath). Bake for 45–50 minutes, until the edges are set but the center still has a slight wobble. Turn off the oven, leave the door ajar, and let the cheesecake cool inside for 1 hour. Refrigerate overnight to set completely.
- Make Frosting: Using a stand mixer or hand mixer, beat cream cheese and butter together until light and fluffy. Gradually add sifted powdered sugar, followed by vanilla and salt. Continue beating until smooth and spreadable.
- Assemble the Cake: Level the cooled red velvet layers if needed. Place one layer on a serving plate. Spread a generous layer of frosting on top. Carefully remove the cheesecake from the springform pan and place it on the frosted cake layer. Top with the second red velvet layer. Apply a thin crumb coat of frosting around the entire cake, then add a final, smooth layer of frosting.
- Glaze and Decorate: In a small saucepan, warm the jam, water, and lemon juice over low heat until smooth. Let cool slightly, then drizzle over the top of the cake. Sprinkle with red velvet crumbs and dark chocolate chips. If desired, pipe additional frosting details using a pastry bag. Chill the cake for at least 2 hours before serving to set the glaze and firm up the layers.
Tips and Variations
- Room temperature ingredients are essential for a smooth batter and cheesecake filling. Remove dairy products from the refrigerator at least 1 hour before baking.
- Use gel food coloring instead of liquid to achieve a vibrant red color without affecting the cake’s texture.
- Do not overmix the cheesecake batter after adding eggs, as this can cause cracking during baking.
- For clean cheesecake slices, dip a sharp knife in hot water, wipe it dry, and cut between servings.
- If you prefer a simpler version, omit the chocolate cookie crust and focus on the cake and cheesecake layers.
- For a dairy-free option, use plant-based cream cheese and butter alternatives, though texture may vary slightly.
Nutrition Estimate
Per serving (based on 10 servings):
- Calories: ~650
- Total Fat: ~40g
- Saturated Fat: ~18g
- Cholesterol: ~120mg
- Sodium: ~350mg
- Total Carbohydrates: ~65g
- Sugars: ~50g
- Protein: ~8g
This Red Velvet Cheesecake Layer Cake is more than just a dessert—it’s a celebration on a plate. With its striking red hue, creamy textures, and rich flavors, it’s guaranteed to be the star of any gathering. Perfect for birthdays, holidays, or whenever you want to create a memorable baking moment.