
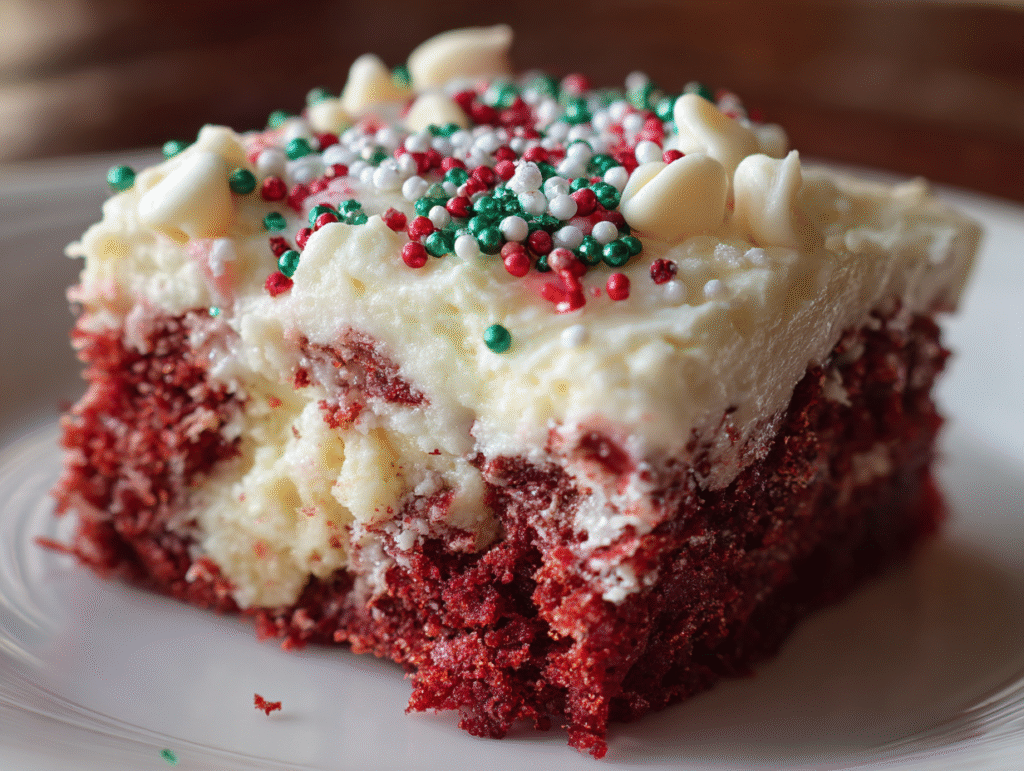
The holiday season is a time for gathering with loved ones, sharing laughter, and indulging in delicious treats. One of my favorite desserts to whip up during this festive time is the Christmas Red Velvet Poke Cake. This cake not only boasts a striking red hue that embodies the spirit of the holidays, but it also features a delightful twist: a creamy filling that seeps into every bite, ensuring that it is moist and flavorful.

I remember the first time I made this poke cake for a family Christmas dinner. The kids were drawn to its vibrant color, and the adults were equally intrigued by the luscious layers of cream cheese and whipped topping. It quickly became a hit, and now, I make it every year as a sweet tradition. This cake is perfect for holiday gatherings, potlucks, or simply as a festive treat to enjoy at home. The best part? It’s incredibly easy to prepare, making it ideal for both novice and experienced bakers alike.
With just a handful of ingredients and minimal prep time, you can create a show-stopping dessert that will impress your guests. Let’s dive into the recipe!
Cook Time: 30 minutes
Total Time: 50 minutes
Servings: 4
Ingredients
- 1 box red velvet cake mix (plus ingredients listed on the box)
- 1 (14 oz) can sweetened condensed milk
- 1 cup white chocolate chips, melted
- 1 (8 oz) package cream cheese, softened
- 1 (8 oz) tub whipped topping (like Cool Whip), thawed
- 1/2 cup powdered sugar
- 1 teaspoon vanilla extract
- Festive sprinkles or holiday-themed decorations (optional)
Instructions
- Preheat your oven to the temperature indicated on the red velvet cake mix box. Prepare the baking dish by greasing or lining it with parchment paper.
- In a large mixing bowl, prepare the red velvet cake batter according to the instructions on the box, adding in eggs, oil, and water as required.
- Pour the batter into the prepared baking dish and bake in the preheated oven for the time specified on the box, typically around 30 minutes, or until a toothpick inserted in the center comes out clean.
- Once baked, allow the cake to cool in the pan for about 10 minutes. Then, using the handle of a wooden spoon or a fork, poke holes all over the top of the cake.
- In a separate bowl, combine the sweetened condensed milk with the melted white chocolate chips until smooth. Pour this mixture over the cake, ensuring it seeps into the holes for maximum flavor.
- In another bowl, beat together the softened cream cheese, powdered sugar, and vanilla extract until smooth and creamy. Gently fold in the whipped topping until well combined.
- Spread the cream cheese topping evenly over the cooled cake. If desired, sprinkle festive decorations or sprinkles on top for a cheerful presentation.
- Refrigerate the cake for at least 1 hour before serving to allow the flavors to meld and the cake to set properly.
Tips for Success
- **Cool the Cake**: Make sure the cake is completely cooled before poking holes, or the condensed milk will leak out.
- **Add a Drizzle**: For an added touch, consider drizzling some melted white chocolate over the topping before adding sprinkles.
- **Storage**: Store in the refrigerator to keep the cake fresh. It can last up to 3 days in the fridge.
- **Make-Ahead**: This cake can be made a day in advance, allowing the flavors to develop even further.
Recipe Science
The poke cake method is particularly effective for infusing flavor into baked goods. The holes created in the cake allow the sweetened condensed milk and white chocolate mixture to penetrate deeply, resulting in a moist and flavorful dessert. The combination of cream cheese and whipped topping creates a light yet rich frosting that complements the dense texture of the red velvet cake.
Serving Suggestions

This Christmas Red Velvet Poke Cake is best served chilled, making it a refreshing treat after a hearty holiday meal. Pair it with a scoop of vanilla ice cream or a dollop of additional whipped cream for an indulgent dessert experience. It’s ideal for holiday parties, family gatherings, or simply as a sweet surprise for your loved ones. The vibrant red color also makes it a stunning centerpiece on your dessert table.
Storage & Leftovers
To store your poke cake, cover it with plastic wrap or transfer it to an airtight container. It can be kept in the refrigerator for up to 3 days. While the cake will remain delicious, the texture of the whipped topping may change slightly upon storage. For best results, enjoy it within a couple of days for optimal freshness.
Frequently Asked Questions
- Can I use homemade red velvet cake? Yes, you can substitute a homemade red velvet cake for the box mix. Just ensure it is baked and cooled before proceeding with the poke cake method.
- What can I use instead of sweetened condensed milk? For a dairy-free alternative, try using coconut condensed milk or a homemade version using coconut milk and sugar.
- Can I make this cake gluten-free? Yes, you can use a gluten-free red velvet cake mix to accommodate dietary restrictions.
- Is there a substitute for cream cheese? You can use mascarpone cheese or a dairy-free cream cheese alternative if needed.
- How can I make this cake more festive? Consider adding crushed peppermint candies or chocolate shavings as toppings for added flavor and holiday spirit.